Settings and Customization
Bike IQ adapts to how you ride. From unit preferences to bike profiles to map layers, every setting is designed to get out of your way and let you focus on the road.
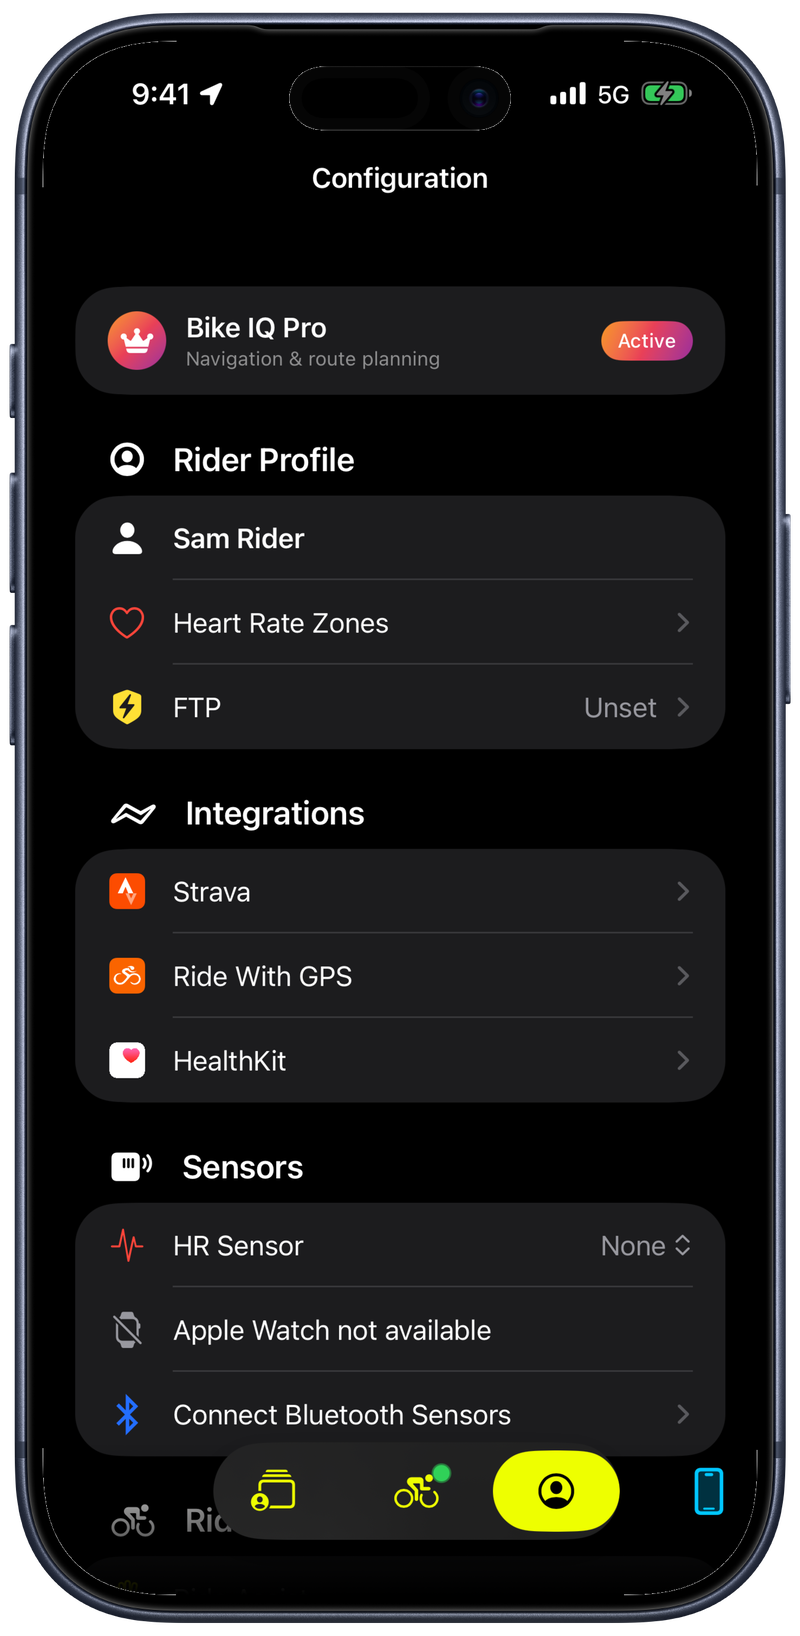
Profile Settings
Your profile stores your name, email, gender, and birth date. The most important field here is body weight. The virtual power meter uses your weight directly in its physics model, so accurate weight means accurate watts. Update it whenever your weight changes meaningfully.
You can also set your FTP (Functional Threshold Power) manually or let Bike IQ auto-detect it from your ride history. FTP drives your power zones and intensity calculations.
Bike Profiles
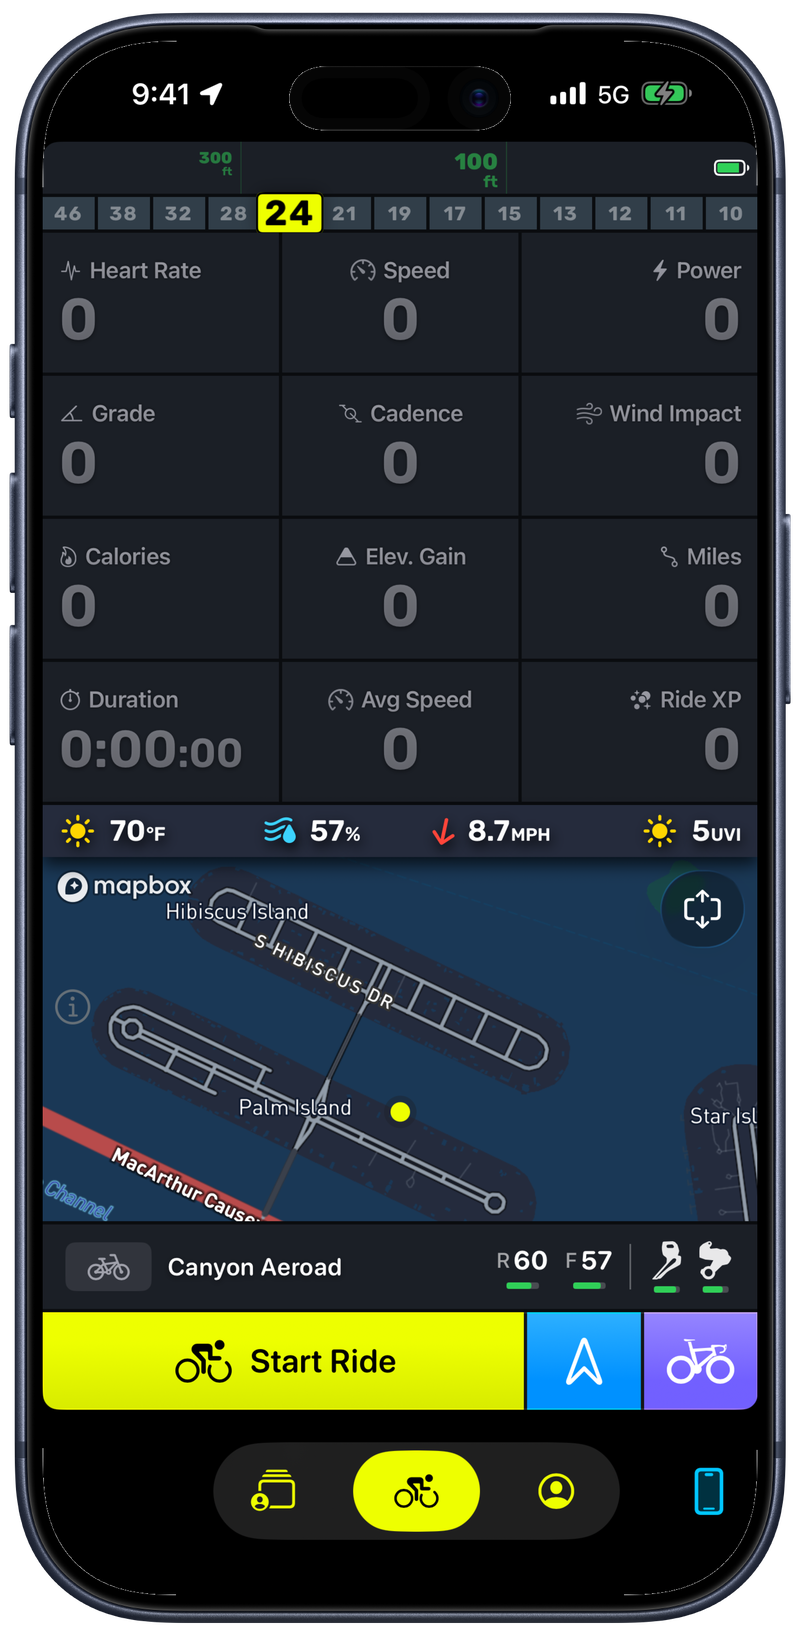
Bike IQ supports multiple bike profiles. Each profile stores a name, category, bike weight, tire type, and handlebar position. These parameters feed into the aerodynamic and rolling resistance models that power your virtual power estimates.
Each bike also has its own sensor assignments, so your road bike can use one power meter while your gravel bike uses another. You configure the drivetrain (chainrings and cassette) for gear tracking and specify tire dimensions for accurate speed calculations.
Before starting a ride, select the bike you are riding. The app uses that profile's weight, tire, and aero settings for the entire session. See Getting Started for initial bike setup.
Units
Set your system-wide preference to metric or imperial. Bike IQ also supports per-metric overrides, so you can mix and match. Use kilometers for distance but Fahrenheit for temperature, or meters for elevation but miles per hour for speed. Whatever feels natural.
Ride Settings
Three settings control how your ride recording behaves:
- Auto-pause automatically pauses recording when you stop moving and resumes when you start again. Ideal for city riding with frequent traffic lights.
- Wait-for-movement threshold controls how many seconds of being stopped before auto-pause activates. A lower threshold makes auto-pause more responsive, pausing quickly at red lights and stop signs. A higher threshold is more tolerant of brief slowdowns, such as rolling through a quiet intersection or slowing for a speed bump. Adjust this based on your riding environment.
- Unpause reminder triggers a notification if you start moving but forget to resume a manually paused ride. This prevents the common mistake of pausing at a cafe stop and then riding away without recording the rest of your ride.
For more on how these work during a ride, see Recording a Ride.
Map Display
The live map is your primary view while riding. You can toggle several layers on or off in Map Settings to reduce visual clutter or surface useful detail:
- Buildings for 3D building outlines in urban areas
- Road labels for street names on the map
- Points of interest for nearby businesses, parks, and landmarks
- Contour lines for terrain elevation lines on the map
- 3D objects for extruded map features
Two additional map features enhance climbing:
- Auto climb view automatically switches to a dedicated climb perspective when you approach a significant climb, showing gradient and distance remaining.
- Route elevation profile displays an elevation chart along your planned route so you can see what terrain lies ahead.
Heart Rate Zones
Bike IQ provides five heart rate zones based on your maximum heart rate. You can set your max heart rate manually or let the app estimate it from an age-based formula (220 minus your age). Zones appear as color-coded indicators next to your heart rate value on the ride screen and in post-ride analysis. For details on connecting a heart rate source, see Heart Rate Sensors.
The five zones and their default thresholds are:
- Zone 1 — Recovery (below 60% of max HR): easy spinning, warmup, and cooldown. This is active recovery effort where your heart rate stays low and your body clears lactate.
- Zone 2 — Endurance (60-70%): the foundation of base training and long rides. You can hold a conversation and sustain this effort for hours. Most of your training volume should happen here.
- Zone 3 — Tempo (70-80%): moderate effort at a sustained pace. Conversation becomes difficult. This is the "no man's land" between easy and hard, useful for tempo rides and group rides.
- Zone 4 — Threshold (80-90%): hard effort typical of interval work and time trials. You can sustain this for 20 to 60 minutes. Training here builds your lactate threshold.
- Zone 5 — VO2max (90-100%): maximum effort in short bursts. Sprints, hill attacks, and high-intensity intervals fall here. Sustainable for only a few minutes at most.
If you know your actual max heart rate from a lab test or field test, enter it as a custom value for more accurate zones. The age-based formula is a good starting point, but everyone is different.
Audio Settings
Control the sounds Bike IQ makes during your ride:
- Ride notifications for start, pause, and finish sounds
- Radar threat alerts for audible warnings when a vehicle approaches from behind (see Safety Features)
- Bike bell toggle and sound selection, with multiple bell tones available
- Auto-resume audio to restore music playback after voice or notification audio finishes
Navigation Voice
When following a route, Bike IQ provides turn-by-turn voice guidance. You can choose from multiple voice options in settings. Pick the one that is easiest to hear over wind and traffic. For route planning and navigation details, see Navigation and Routes.
Live Activity
Live Activity shows key ride metrics on your iPhone lock screen and Dynamic Island without unlocking your phone. During a ride, you can glance at your current speed, distance traveled, and elapsed time directly from the lock screen or the Dynamic Island pill at the top of the display.
This is particularly useful when your phone is mounted on the handlebars and the screen auto-locks to save battery. Rather than tapping to wake the screen, your ride data stays visible at all times. The metrics update in real time, so you always see current values without any interaction.
To enable Live Activity, go to Settings → Live Activity and toggle it on. The feature works on any iPhone running iOS 16.1 or later for lock screen widgets. If you have an iPhone 14 Pro or later, you also get the Dynamic Island integration, which keeps a compact summary of your ride visible even when using other apps.
Live Activity has minimal additional battery impact. The lock screen and Dynamic Island are already rendering content, so showing ride metrics instead of the default clock or status bar adds negligible power draw. You should not notice a meaningful difference in battery life with the feature enabled.
Sensor Management
Bluetooth sensors are assigned either per-bike or globally. Bike-specific sensors like power meters and speed sensors attach to a bike profile. Rider sensors like heart rate monitors apply across all bikes.
For heart rate, you choose between three sources: no heart rate, a Bluetooth heart rate monitor, or Apple Watch. Each option works differently and has its own tradeoffs. See Heart Rate Sensors for a full comparison.
For step-by-step pairing instructions, see Bluetooth Sensor Pairing.
Related Guides
- Getting Started: initial setup, permissions, and first ride
- Bluetooth Sensor Pairing: connecting power meters, cadence sensors, radar, and more
- Heart Rate Sensors: Apple Watch vs Bluetooth heart rate monitors
- Virtual Power Meter: how weight and bike settings affect power accuracy
- Recording a Ride: using auto-pause, voice control, and the ride screen